In today's digital age, businesses are constantly seeking ways to streamline processes and enhance security. One such improvement is the ability to add electronic signatures to checks using Crystal Reports.
Whether it's Accounts Payable or Payroll, integrating electronic signatures can add a layer of authenticity and efficiency to your financial transactions.
Let's dive into a step-by-step guide on how to achieve this seamlessly. This is a little techy, but don't fret, this is the easiest one yet for those of you with any doubt in your Crystal Report abilities.
Prerequisites: Before diving into the process, ensure you have a Crystal Reports license. If not, you can download a free trial version from here. Additionally, have your signature file ready in JPG format.
Step 1: Copy the Report Using the Reports Programs, navigate to RP Report Copy and make a copy of the check report you intend to modify. Take note of the file name and location for future reference.
Step 2: In Crystal Reports, open the copied report . This powerful tool will enable you to seamlessly integrate your electronic signature into the check.
Step 3: At the top of the Crystal Reports interface, select '
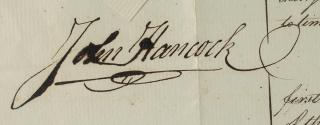
Insert Picture' and browse to locate your signature file. Once found, click to anchor the signature box in the desired area on the check.
Step 4: Resize and Position Adjust the size and position of the signature file by dragging the edges of the picture box to your preferred dimensions. Ensure it fits neatly within the designated space on the check.
Step 5: Configure Signature Format Right-click on the signature file and select "Format Graphic". In the pop-up window, navigate to the 'Suppress' tab. Here, select the blue "x-2" and add the formula {?PrintNonNeg}='Y'. This step ensures that the signature is hidden when printing non-negotiable checks, signified by the change from blue to red.
Step 6: Save the Report Once you're satisfied with the adjustments, save the modified report. This preserves your changes and ensures they are applied whenever the report is generated.
Important Note: When printing via the browser-based cloud viewer, it's crucial to adjust the printer properties to 'Black & White'. Failure to do so may result in the printing of only a solid black image, even when reviewing the document in PDF format. Ensuring 'Black & White' color selection is imperative for accurate printing.
By following these simple steps, you can seamlessly incorporate electronic signatures into your check reports using Crystal Reports. Not only does this enhance security and authenticity, but it also streamlines your financial processes for increased efficiency and peace of mind.
Want to learn how to add more than one signature based off of a CM Account or Bank Account? Contact
ConstrucTech Consulting today to find out how.